What's new
Aloft Forums

Welcome to Aloft Forums. Register a free account today to become a member! Once signed in, you'll be able to participate on this site by adding your own topics and posts, as well as connect with other members through your own private inbox!

Sunset 2025 Builds

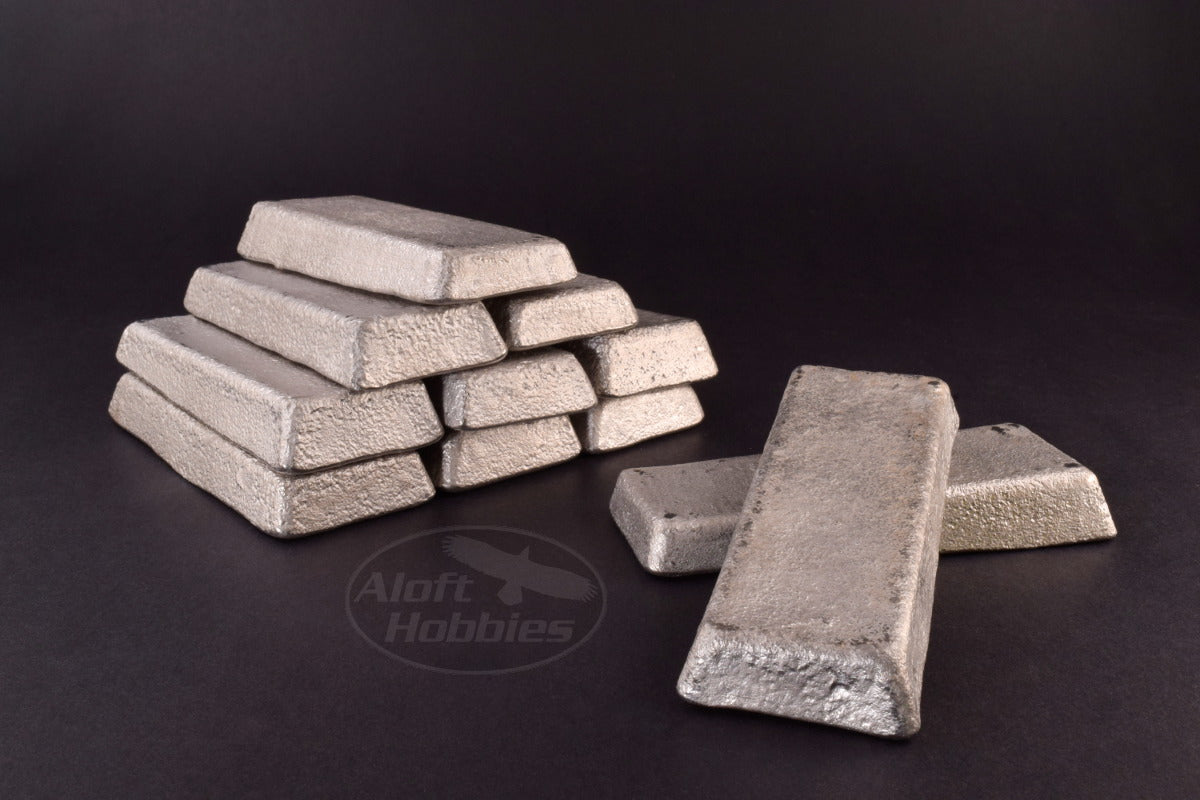
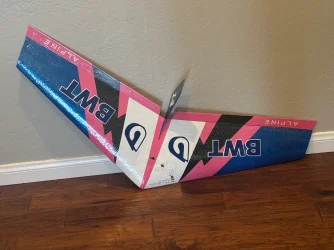
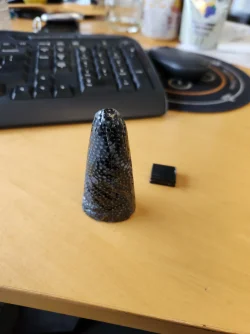
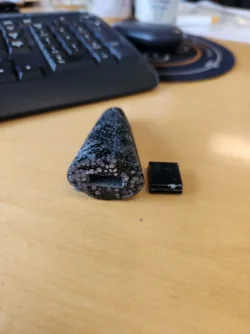
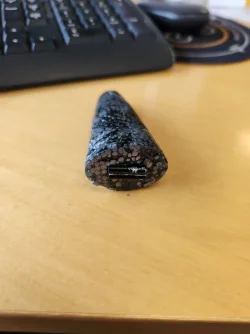
I ended up using bbs and epoxy since I had it on hand and this is what I got. I also molded in a slot in the back where I can add/remove up to two wheel weights if I need to adjust it some. Needed about 210 grams of nose weight to balance out the Forza at 100mm.
 

Attachments

  • 20250411_125942.webp
    20250411_125942.webp
    75.9 KB · Views: 55
  • 20250411_130003.webp
    20250411_130003.webp
    75.9 KB · Views: 25
  • 20250411_130011.webp
    20250411_130011.webp
    76.3 KB · Views: 27
Last edited:
Woods metal!

Use a lighter and melt the woods metal right into the nose of the fuselage. No damage! I love the stuff.
Oh dang… that’s super cool. I wished I would have seen this before my order got shipped out today. What a great solution.
 
Got the Forza CG set but screwed up and couldn't use the ballast I made. Had to redo it due to fuse design that I missed. Its all set now though at 98-99mm for maiden with a weight thats easy to remove to move it back to 100-101mm if needed/wanted.

Total RTF weight comes in at 2145 grams which seems to be about average for the Forza I think. Let me know if that sounds right for all up weight.

Super excited for Sunset, cant wait to see everybody!

20250412_180429.webp
 
Last edited:
Finished up the electronics bay with a magnetic latch for the door (magnets and control rod). I had submerged all the wiring in the plane while constructing.
PXL_20250414_143103298.webp

Got the wing beds glued down the center line of the wing, ready to glue the fuselage on.
PXL_20250414_143052472.webp

Also realized that the motor pods i installed are setup really well to add a ton of weight to hit cg. Its only a couple inches behind the nose of the fuselage and will be much much easier to use so ill probably try doing that as plan A
PXL_20250413_235927794.webpPXL_20250413_235925735.webp


Just need to do a lite sanding job to remove the spackle and i can get working on the verticals (no control surfaces) and covering
 
Ill sand the leading edge corners a little and bring the trailing edge to a point. Going to put a little bit of carbon tow on each side and glue on some veneers. Than it will all get iron on color
 
Its pretty close to being ready for covering. I just need to swipe the top layer of spackle with some sandpaper, finish shaping the back of the fuselage area and glue on the verticals. Wiring and electronic bay is all in place.
 
I finished up an Aloft BamBam combat wing for my sons buddy, Taylor. He’s a Fernando Alonso F-1 fan, so that’s the colors he picked. From here it’s just a bit of maintenance and start charging batteries then figure how I’m going to pack all the crap I plan to bring lol.
 

Attachments

  • IMG_1980.webp
    IMG_1980.webp
    230.3 KB · Views: 23
Back
Top