Aloft Forums
You are using an out of date browser. It may not display this or other websites correctly.
You should upgrade or use an alternative browser.
You should upgrade or use an alternative browser.
Mini Q
- Thread starter Glenn Beer
- Start date
JustinMader
Active User
Working on it. It's been really windy each time I've taken it out, so the footage is super choppy. Will get out early one morning while it's still flat for some smooth runs.Sweet - Looks to be nice and smooth. Have some in flight video? Looks like a pretty nice spot.
JustinMader
Active User
CG of 23mm has mine flying really nice.
JustinMader
Active User
JustinMader
Active User
Lighter than what?
TJI has been refining the Mini Q over the years. I have one of the newest versions sitting on my desk and it is so much nicer than the first versions we were selling. The paint and finish is so much nicer, they are lighter, and they are stronger. But even the very first models are great flying planes that are tough as nails.
TJI has been refining the Mini Q over the years. I have one of the newest versions sitting on my desk and it is so much nicer than the first versions we were selling. The paint and finish is so much nicer, they are lighter, and they are stronger. But even the very first models are great flying planes that are tough as nails.
JustinMader
Active User
Lighter than what?
TJI has been refining the Mini Q over the years. I have one of the newest versions sitting on my desk and it is so much nicer than the first versions we were selling. The paint and finish is so much nicer, they are lighter, and they are stronger. But even the very first models are great flying planes that are tough as nails.

Mini Q
The servo is glued in and it is perpendicular to the hinge. Trust me that the square is on the hinge line, but since I have the horns in place I can't lower the square. I can get the rod through the cover, but it comes out at an angle, from the left side on the front and up against the right...
Jerry mentioned lightening up the build in a recent post.
andir
New User
Just started building my MiniQ, selected a nice 2208 motor with a 7x4 prop that should generate roughly 2:1 power-to-weight ratio. I want to mount the motor mount / firewall at the front of the fuselage. I realized that I had to sand it down a little to make it fit as it seems to be 0.05mm wider and the front or the mount aren't perfectly round. So far so good. No sanding done yet. Have others done the same or just glued it in 2-3mm inwards where it fits very snug? Probably one pass with a medium grid on the fuse and the mount would be good enough. Just curious about your opinions since removing stuff is easy but then adding it back might be a nightmare 
Motor mounts for most models will need some sanding to fit properly. You want a nice tight joint, also, you need to sand the inside of the fuselage a little to make sure the glue will have a solid surface to hold onto. Depending on the motor the motor mount may well be set back from the edge a few mm. Really depends on the motor shaft length, etc. You want to make sure you have a lot of shaft into the spinner collet.
Use a good quality glue to set the firewall in place. Do not use super glue. (You can use a tiny bit of super glue to set the firewall in place while the main glue cures.
Hope this helps.
Use a good quality glue to set the firewall in place. Do not use super glue. (You can use a tiny bit of super glue to set the firewall in place while the main glue cures.
Hope this helps.
andir
New User
Thanks!Motor mounts for most models will need some sanding to fit properly. You want a nice tight joint, also, you need to sand the inside of the fuselage a little to make sure the glue will have a solid surface to hold onto. Depending on the motor the motor mount may well be set back from the edge a few mm. Really depends on the motor shaft length, etc. You want to make sure you have a lot of shaft into the spinner collet.
Use a good quality glue to set the firewall in place. Do not use super glue. (You can use a tiny bit of super glue to set the firewall in place while the main glue cures.
Hope this helps.
I was planning on using some ~30ish minute epoxy for the mount. Potentially thickened a bit depending on how the mixture feels.
I was just curious about the sanding as I've had other composite models where a ~33mm mount would sit snug out of the mold.
There is plenty of space for the spinner when the motor mount sits flush. I'd say probably 10 mm or more. I dry fitted it with my spinner already and it looks good.
omegooliebird
User
Just taper the mount a bit, it will fit nice and also the mating surfaces will be fully in contact. There is a little sanding needed in the inside sides of the fuselage as the seams are a bit thicker, so can make the internal of the nose a little out of round.Thanks!
I was planning on using some ~30ish minute epoxy for the mount. Potentially thickened a bit depending on how the mixture feels.
I was just curious about the sanding as I've had other composite models where a ~33mm mount would sit snug out of the mold.
There is plenty of space for the spinner when the motor mount sits flush. I'd say probably 10 mm or more. I dry fitted it with my spinner already and it looks good.
andir
New User
Thanks!Just taper the mount a bit, it will fit nice and also the mating surfaces will be fully in contact. There is a little sanding needed in the inside sides of the fuselage as the seams are a bit thicker, so can make the internal of the nose a little out of round.
I've finished that a couple of hours ago. The width of the nose was about 1mm smaller than the mount. Sanded it on the inside and the mont and it fit snug. Letting it fully cure until the morning. Then only the two control horns are required and perhaps I can already fly it by the afternoon (if I apply a bit of heat to speedup the epoxy curing).
andir
New User
Had the first couple of flights today. It’s a lovely flyer. I’ll have to add a bit more weight to the front to make it fly even better. So far only my 3S 850mAh battery, ESC and motor are in the front. The RX with about 4g sits just behind the fuselage spar. I’ll try 10g next. That should move the CG into the 18mm area.
JustinMader
Active User
Here's a link to the 3D files for my FPV version: https://www.thingiverse.com/thing:6822355
Started to print it in PTGE CF for JarronHere's a link to the 3D files for my FPV version: https://www.thingiverse.com/thing:6822355
Pierre Diatta
New User
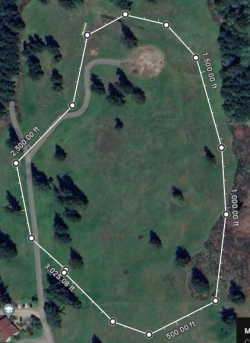
Hi everybody, i'm french and i bought this wonderful wing end of last year. I was doing FPV a long time ago with the smashing Pit Lab autopilot installed in a Blizzard from MPX. Now i regularly practice F3F glider on slope. So i decided to not install an engine on this bloody wing and use it on slope. Not easy to launch and she need good conditions to fly but it is a rocket. I love it (sorry i don't know how to insert some photos.
Very nice. Looks like a very good slope to play on!
Mini-Q should be pretty easy to launch with a bit of uptrim for the launch. This assumes that slope has smooth air on the edge, may not be the case. Should be able to fly is medium to medium light lift too, but heavy lift is really what she likes.
Mini-Q should be pretty easy to launch with a bit of uptrim for the launch. This assumes that slope has smooth air on the edge, may not be the case. Should be able to fly is medium to medium light lift too, but heavy lift is really what she likes.
gusfliesrc
User
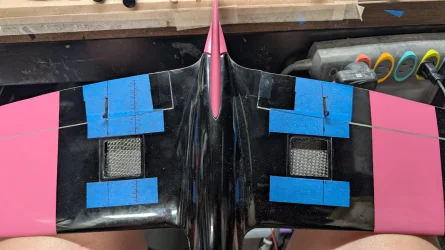
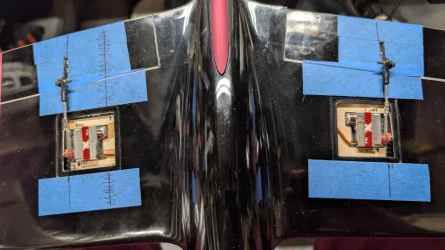
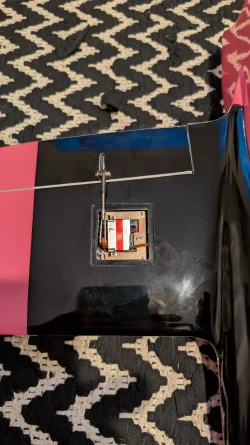
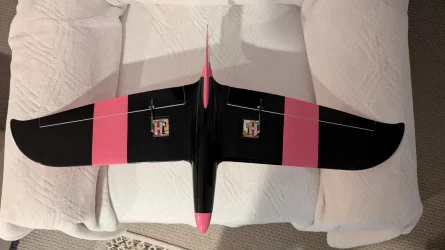
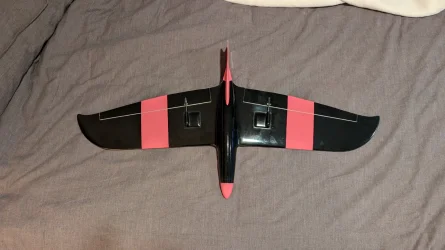
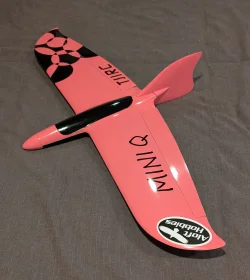
I picked up a mini Q, after unboxing it, I ate the included bag of M&Ms while I marveled at its beauty. I did notice a small manufactures defect , there was about 1" section of the left aileron that had delamination at the trailing edge. there was one thing I didn't like, the hinge line on the aileron is not square to the servo slot, so I plan to use some ball linkage on the control horns as no to stress the servos. The build was straight forward, after sizing things up, I cut the slots to install the control horns in the ailerons. then I mixed up some epoxy, fixed the delamination, glued in the included servo trays, and glued horns in to the newly cut slots. I made a 2s Li-Ion 950 pack from 16340 cells. mine required about 1 Oz of lead in the nose cone to get the CG at 23 mm behind the leading edge. some radio set up and BOOM!, she's ready for maiden. Now I wait for wind.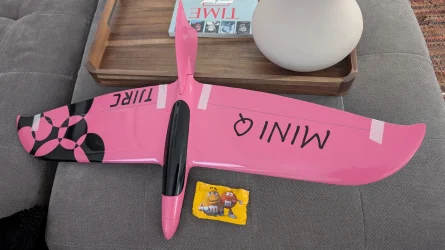



gusfliesrc
User
No worries, I was mixing epoxy anywaysGlad you got the trailing edge issue sorted out. We have not seen that on any other models from them, very sorry we did not catch the flaw here. We owe you, so let us know when you order again.. We will figure out something for you.
Similar threads
- Replies
- 28
- Views
- 3K

