Yotaman1985
Very Strong User
Thanks for the explanation Wayne 
 ). Seemed to work alright and looks decent to my extremely untrained eye. Lol Ill let it cure tonight and try unwrapping/removing it tomorrow
Hey Yotadude:Thanks Doc,
I may go that route for simplicity although I dont have ballast so the tube wont be used anytime soon. Ill cross that bridge when I eventually get some ballast for it. I feel like I remember reading that this glider does best if the wings are loaded up first and then fuselage tube, does that sound right?
Thanks Wayne,Looks great for a first try! I'd totally fly that.
You might allow the corners to be a bit wetter going into the bag to seal the edges, and then sand them down a bit after they cure.
What are you using for resin?
I did not use mylar. Is that supposed to help push the glass down into the corners?Did you use a mylar sheet or anything? I didn't see it in the photos. One of the tricks a buddy did was sand the top of mylars where he had to deal with a lot of curvature.
#2 should do the trick even with thin film. It is pretty easy to do also. Don't let them touch the film at the top of the wing.Working on reducing the HOWLING NOISE
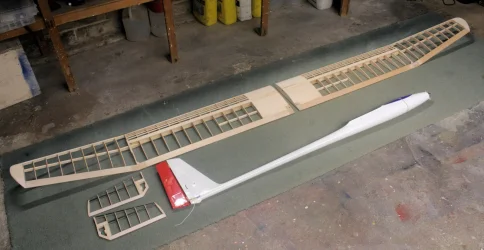
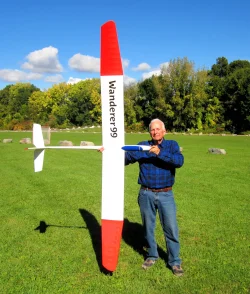
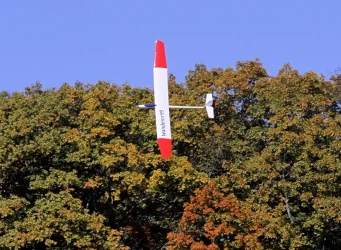
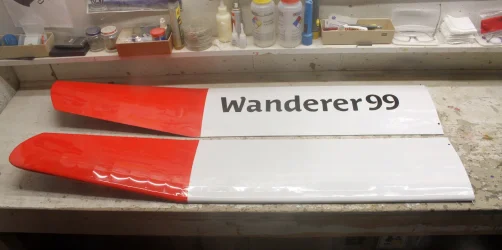
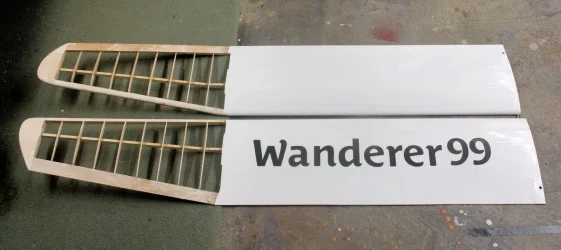
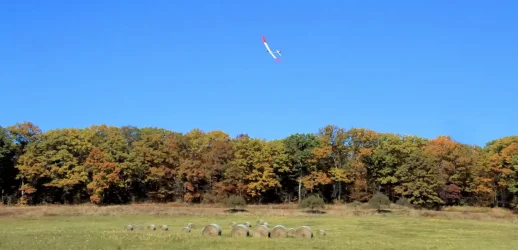
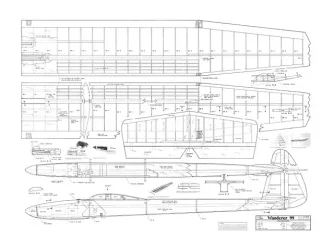
Last Fall, test flying my scratch build WANDERER-99 wing on my store-bought PRELUDE fuselage,
I noticed the plane made a "Halloween Howl" sound when pouring on just a little bit of speed.
This was repeatable.
Next flying day, flying buddies said "That's not a HOWL, sounds more like an AIR RAID SIREN."
My first move was to close up the gap between the fin and rudder, visible in photo 1.
Now it's a tape hinge, but the sound is still present.
My current theory is that it's caused by "micro fluttering" of the tip panels.
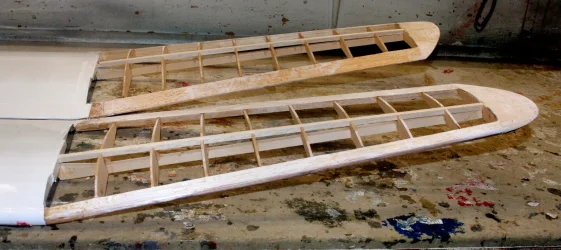
The inner panels of this design are quite hefty, incorporating 3/4 inch spruce spars, top and bottom, with shear webs.
The outer panels are quite sparse, single lower spar only, presumably to lighten the tips to indicate thermal activity.
I removed the covering and installed a top spar of 1/4 x 1/4 balsa, and I'm pleased about how much the tip stiffened up.
Now, how much more structure to add?
1. Extend the three turbulator spars from the inner panels.
2. Install diagonal braces between the spars an the leading edges.
3. Combination of 1. and 2 .
4. Add no more structure but cover with TopFlite SUPER MONOCOTE, the covering material most likely used by the designer.
Right now I'm inclined to go with #4 to finish the rehab quickly an still keep the tips as light as possible, as designed.
My wing was originally covered with Value Hobby Neucover, a low-temperature film.
Any other ideas or suggestions?
Hey Yota - and anybody else who may see this:I un-bagged fin #2 this morning and it turned out a bit better than the first but still not great. Maybe a 7 or 8 out of 10. Still have some voids on the edges but much smaller and more managable than the first. Peel ply came off easily on one side but I had an issue with the other as the fiberglass had been completely wetted out and I could not seperate the edge of the fiberglass from the peel ply. Ended up tearing some of the fiberglass and pulled up a corner on the fin. CA'd it back down and it should be fine but a lesson learned about peel ply. Gonna wait until this evening to do the final sanding so the CA that wicked into the edges can cure. The weight of this one is 15 grams all trimmed up and ready to fly.View attachment 22529View attachment 22530
View attachment 22531
Passaj CG?@thenated0g There was a 48" molded wing called the Passaj (Aeromod ) It comes apart at the center line and can be packed small We have one flies great! With your tools it should not be too hard to put something together.
Peel ply...yaaahhh...well anyway I hope it's good advice.Thanks for the info Doc. The fabric with the red stripes is the peel ply, not the actual fiberglass but I will definitely use that info in the future as the fiberglass I have just came from amazon.
Got the 3rd fin un-bagged today and it turned out great. A solid 9 out of 10. Was able to get the glass and carbon to wrap around all the edges this time.
Got the Z1 balanced and ready for a maiden. Just need to tape the carbon covers on and shes ready. Came in at 18.5 oz RTF weight which Im pretty happy with. View attachment 22538View attachment 22539View attachment 22540View attachment 22541