What's new
Aloft Forums

This is a sample guest message. Register a free account today to become a member! Once signed in, you'll be able to participate on this site by adding your own topics and posts, as well as connect with other members through your own private inbox!

Multiplex Mini Solius --> RC Conversion

Wayne

Administrator
Staff member
Joined
Nov 29, 2017
Messages
7,856
Solutions
2
Reaction score
4,582
Location
Novato, CA USA
You may have seen Jarron flying one of these at Sunset last year. Or maybe you saw us flying them at Los Banos in 25mph winds? If you didn't, allow me to explain, these are seriously fun little planes! You can fly them in a tiny place, they are a hoot to fly and mess around with, they are nearly impossible to kill and are a riot when you have a few other pilots flying them at the same time. They are at home on just about any slope from micro lift up to maybe 30mph with some ballast slapped on the CG. They are so tiny you can always bring them with you. They are a great plane to test out a new flying area, etc.

Often times a free flight converted model flies, well, like a free flight model. But the Mini Solius actually flies like a little foamy RC plane. Loops, rolls, inverted flight are all good.

We have abused the heck out of ours in the past. Doing things like flying them into the trunk of the car, aero towing them, combating much larger models, and just plane being silly. I hope you are getting the idea here.. FUN

So being a free flight chuck glider for kids, it is up to you how you would like to convert them. We started off with 3 servos controlling the ailerons and elevator. Those were great, no complaints. Then our friend Mike R. brought his pitcheron build by the shop and it looked even better, and he reported it also flew great. We don't think it is worth the trouble or weight to control the rudder, but if that is your cup of tea, go for it.

We have these on our site here:
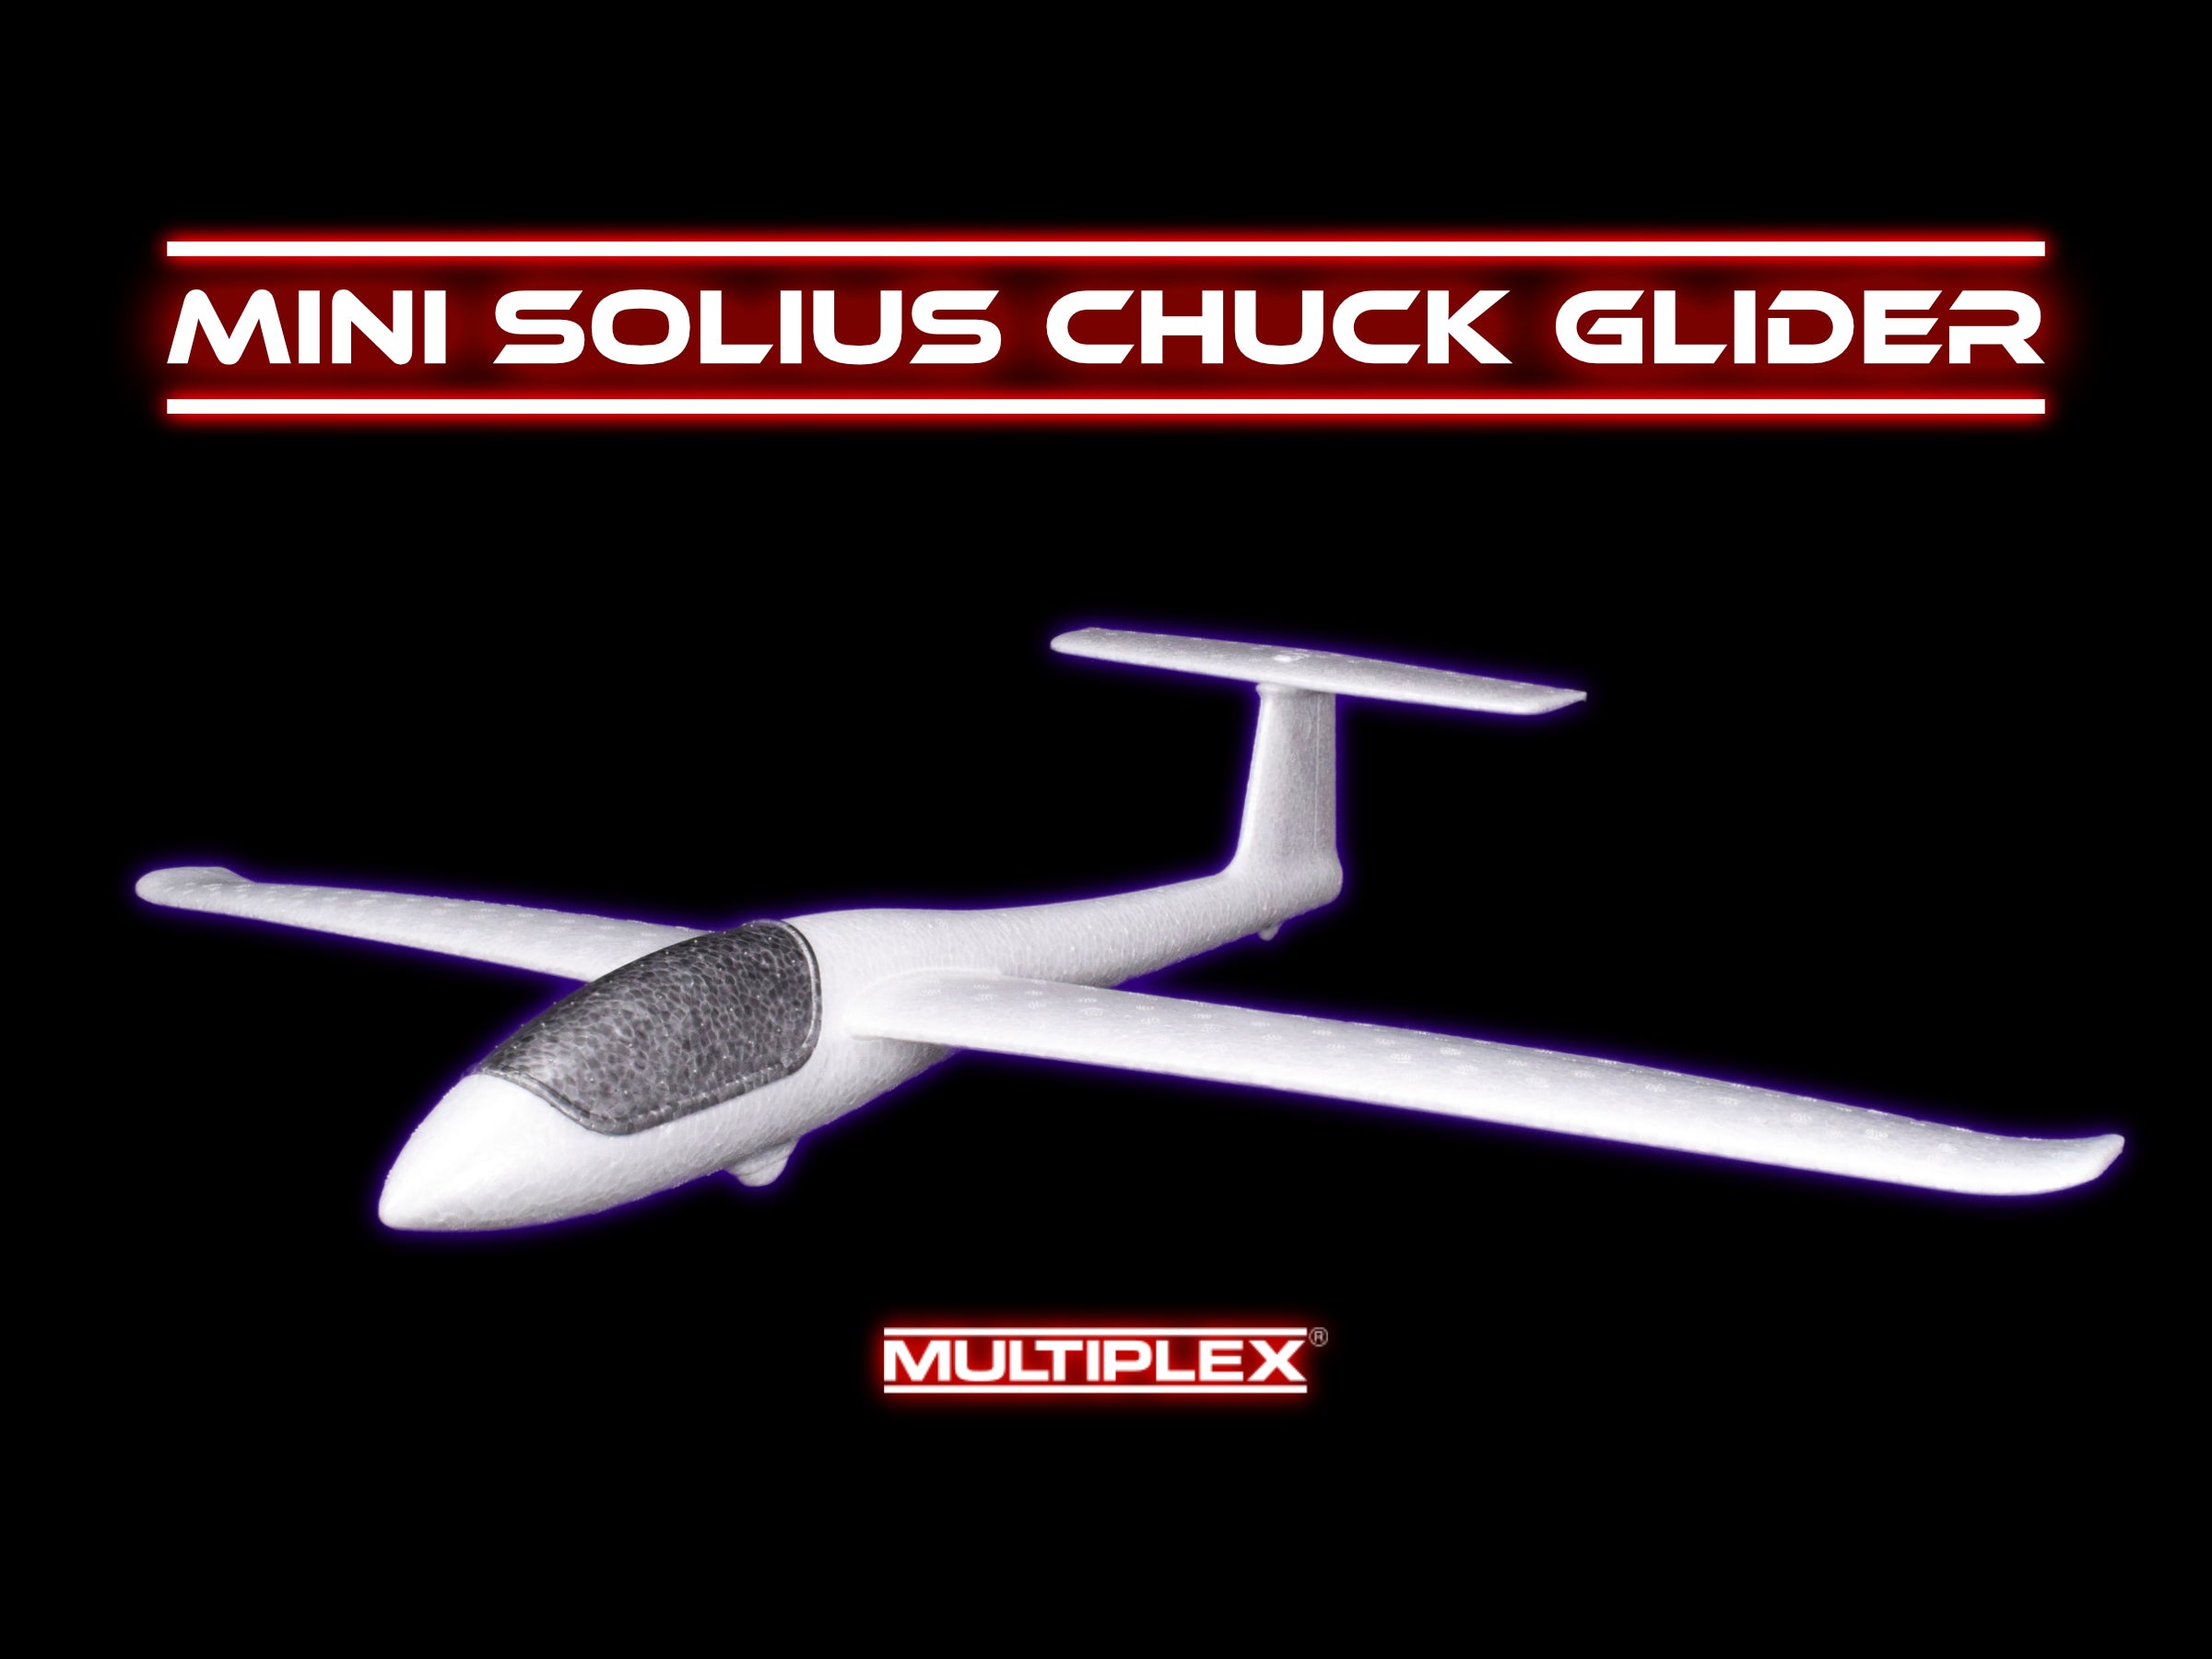
or you can get them direct from Mr Multiplex.

Here are some pictures of our aileron builds. Nothing special. Just remove some foam for radio gear, run the wires, a little carbon strip for a wing spar and linkages, etc. These planes have been through the ringer! Still fly great.
ms-3servo - 1.jpeg

ms-3servo - 2.jpeg

ms-3servo - 3.jpeg

ms-3servo - 4.jpeg

ms-3servo - 5.jpeg
 
Last edited:

Wayne

Administrator
Staff member
Joined
Nov 29, 2017
Messages
7,856
Solutions
2
Reaction score
4,582
Location
Novato, CA USA
Now I'm working on a wingeron version and took a few photos the other night.

The downside is that Multiplex just puts these in a bag, so the airframes usually have some bends on them to sort out. My last plane it was just the wing, this one all 3 parts were bent. Check out that left turn action!
ms-pitch - 1.jpeg

We don't have much hot water here at the office, so some weights and time does the trick.
ms-pitch - 2.jpeg

ms-pitch - 3.jpeg


OK - While those straighten out, lets work on the wingeron spars. We will need a tube and a proper fitting rod. Think this was 6x3 tube and 3mm rod. I used a #30 drill to open up the tube inside diameter to fit the rod nicely. I drilled in from both ends. The drill bit could just overlap this way. I think this tube section could actually be a lot shorter. I still had to sand the 3mm rod some as the drilling from both directions was not in perfect alignment. Good enough.. We want the tubes to rotate freely, but not be sloppy.
ms-pitch - 4.jpeg


Mark and carve out the foam. Notice the tube is in 3 pieces, a center section, and 2 outer sections.
ms-pitch - 5.jpeg

ms-pitch - 6.jpeg

And this is where I may have failed, I used gap filling CA to "tack" things in place. When I came back some of the glue had flowed into the areas where my tube joints are. :( Did I glue the rod and the tubes together? I did apply some grease to the rod to avoid this, so hopefully not. Will find out when we cut the foam wing into 3 pieces.
ms-pitch - 7.jpeg

Closeup view that shows the 1x3 carbon strip that is glued to the outer tubes and runs out to the wing tips.
ms-pitch - 8.jpeg

Later I filled the voids between the tubes and the foam with some low temp hot melt glue. All nice and smooth now.
That is all the further I am on the build. I probably spent an hour or two on this. Some just figuring things out, and way too much time straightening the bent parts.
 

Hawaii Sloper

Very Strong User
Joined
Jun 26, 2022
Messages
530
Reaction score
594
Location
Kona Hawaii
Now I'm working on a wingeron version and took a few photos the other night.

The downside is that Multiplex just puts these in a bag, so the airframes usually have some bends on them to sort out. My last plane it was just the wing, this one all 3 parts were bent. Check out that left turn action!
View attachment 14190
We don't have much hot water here at the office, so some weights and time does the trick.
View attachment 14191
View attachment 14192

OK - While those straighten out, lets work on the wingeron spars. We will need a tube and a proper fitting rod. Think this was 6x3 tube and 3mm rod. I used a #30 drill to open up the tube inside diameter to fit the rod nicely. I drilled in from both ends. The drill bit could just overlap this way. I think this tube section could actually be a lot shorter. I still had to sand the 3mm rod some as the drilling from both directions was not in perfect alignment. Good enough.. We want the tubes to rotate freely, but not be sloppy.
View attachment 14193

Mark and carve out the foam. Notice the tube is in 3 pieces, a center section, and 2 outer sections.
View attachment 14196
View attachment 14197
And this is where I may have failed, I used gap filling CA to "tack" things in place. When I came back some of the glue had flowed into the areas where my tube joints are. :( Did I glue the rod and the tubes together? I did apply some grease to the rod to avoid this, so hopefully not. Will find out when we cut the foam wing into 3 pieces.
View attachment 14198
Closeup view that shows the 1x3 carbon strip that is glued to the outer tubes and runs out to the wing tips.
View attachment 14200
Later I filled the voids between the tubes and the foam with some low temp hot melt glue. All nice and smooth now.
That is all the further I am on the build. I probably spent an hour or two on this. Some just figuring things out, and way too much time straightening the bent parts.
Just picked up a couple of these for the lava dome 🤙
 

thenated0g

Very Strong User
Joined
Dec 5, 2017
Messages
2,785
Reaction score
2,587
Location
Lakeport, ca
Pretty slick.
@Wayne how rigid is that foam? On my cheetah mod i cut out the controls and replaced with balsa.

For my elevon build ill try first to just remove the horizontal stabilizer. If i find im too tail heavy with the parts i have i will shorten the tail and move the vertical closer.
 

dang

New User
Joined
Aug 4, 2018
Messages
9
Reaction score
2
The pitcheron looks clever. A great way to straighten these things out is put them on a 3d printer table and cycle the heat a couple times. Just make sure to leave them weighed down until they are really cool.
 

Wayne

Administrator
Staff member
Joined
Nov 29, 2017
Messages
7,856
Solutions
2
Reaction score
4,582
Location
Novato, CA USA
I'll give the 3D printer solution a try!! Good idea.

Nate - The foam is plenty strong on the control surfaces. No need to convert to wood. I didn't even cut them free on my first build, just freed up the hinge line.
 

thenated0g

Very Strong User
Joined
Dec 5, 2017
Messages
2,785
Reaction score
2,587
Location
Lakeport, ca
This might be of assistance to some who are trying to kit out their little plane. I have a 600 MAH lipo in my two servo pug twisty and in about 11 minutes of flight I used 43 MAH.
Just straight battery voltage to the board and the servos.
Screenshot_20230210-080558.pngPXL_20230210_160620289.jpg
 
Last edited:

dang

New User
Joined
Aug 4, 2018
Messages
9
Reaction score
2
I'll give the 3D printer solution a try!! Good idea.

Nate - The foam is plenty strong on the control surfaces. No need to convert to wood. I didn't even cut them free on my first build, just freed up the hinge line.
3d printer bed worked great on the wing. I had better luck on the fuselage by microwaving wet paper towels and wrapping it.
 

Hawaii Sloper

Very Strong User
Joined
Jun 26, 2022
Messages
530
Reaction score
594
Location
Kona Hawaii
This might be of assistance to some who are trying to kit out their little plane. I have a 600 MAH lipo in my two servo pug twisty and in about 11 minutes of flight I used 43 MAH.
Just straight battery voltage to the board and the servos.
View attachment 14215View attachment 14216
@Wayne has a nice little 500mah tattu suggested with the kits. I picked up a couple of those. Wayne, I think I'll use your method for the control surfaces also. Nice and clean and simple.
 

Wayne

Administrator
Staff member
Joined
Nov 29, 2017
Messages
7,856
Solutions
2
Reaction score
4,582
Location
Novato, CA USA
More updates on the build from Friday's build night.

Put the parts on the 3D printer and set it to "simmer" Worked ok on the elevator, but the fuselage will probably need the hot water method. Or I glue a CF strip into it..
ms2 - 1.jpeg

Here is the basic layout for the wing. Happy to report the grease kept the glue from gluing the inner rod solid to the tubes. No issues. :)
ms2 - 2.jpeg


Using some more reject servos I had on my desk. Marked their location and dremeled out the foam.
ms2 - 3.jpeg


Servos in their pockets. I put them as close to my spar as possible. This should give more throw and keep the leading edge clean. (Put some tape at the bottom of the motors to avoid shorting out on the carbon after some abuse that this plane is sure to see.)
ms2 - 4.jpeg


Popped a hole into the radio bay and routed the wires. You can also see the slot cut into the servo arms, again I just used a dremel saw and a small file to clean it up.
ms2 - 5.jpeg


Marked and cut the space in the wing for the servo arms. Again Dremel saw.
ms2 - 6.jpeg


I used a 1.5 mm rod for the pin that goes into the servo arm, they get glued into a little groove cut into the foam.. (Dremel saw again!) Leading edge is left in tact.
ms2 - 7.jpeg

Almost done.

The servos I used are way overkill. Just cheeping out and using some servos I had kicking around.
 

thenated0g

Very Strong User
Joined
Dec 5, 2017
Messages
2,785
Reaction score
2,587
Location
Lakeport, ca
Thats a really neat design. It was kind of hard to see it in the other guys build so thanks for the closeups. You doing the magnet thing for retention?
 

Wayne

Administrator
Staff member
Joined
Nov 29, 2017
Messages
7,856
Solutions
2
Reaction score
4,582
Location
Novato, CA USA
Yes, it must have the magnets or something to hold the wings in as the servo action pushes the wings off. This is a side effect of driving the wing in this particular method.
 

Hawaii Sloper

Very Strong User
Joined
Jun 26, 2022
Messages
530
Reaction score
594
Location
Kona Hawaii
I got the 2 I ordered from aloft a couple of days ago. Mine also had all
3 parts bent. I was thinking about how to straighten them out because I really didn’t want to go the hot water route. I read somewhere that EPP is formed using steam so I got out my professional clothes steamer and fired it up. It worked great! About 2 minutes in the steam and the body straightened out perfectly. Still trying to decide how to go about the wings.

@Wayne or @Jarron, either of you guys have any input on whether to leave some arc in the wings or is it best to flatten them out when putting the spars in? You can see the arc in the picture. It looks like it is intentional.

I also did some scaling and came up with some of the measurements the aloft guys used for servo and control horn locations.
The ailerons are about 150mm wide. The control horns are located between 25mm and 55mm from the inside surface of the ailerons so locate servo accordingly. The wing is about 11.5mm thick at the area where Jarron has the servo. On the website aloft recommended the emax ES 9052 MD servos. They are 8.5mm thick so they are a perfect fit.
The carbon fiber spar is located about 35mm (Edit: Wayne and Jarron said 39mm and that’s also CG) from the LE with the servo sitting right against it.
Hope this helps anyone else who is building one of these.
Hope to bring one or 2 to Sunset.
 

Attachments

  • 40C6EA3E-0C00-4022-8F92-70CDC76A3DE7.jpeg
    40C6EA3E-0C00-4022-8F92-70CDC76A3DE7.jpeg
    279 KB · Views: 131
  • B453760A-F6E5-4006-BE8F-8C96E6F2AB50.jpeg
    B453760A-F6E5-4006-BE8F-8C96E6F2AB50.jpeg
    190.1 KB · Views: 110
Last edited:

Jarron

Very Strong User
Joined
May 11, 2019
Messages
155
Reaction score
240
I got the 2 I ordered from aloft a couple of days ago. Mine also had all
3 parts bent. I was thinking about how to straighten them out because I really didn’t want to go the hot water route. I read somewhere that EPP is formed using steam so I got out my professional clothes steamer and fired it up. It worked great! About 2 minutes in the steam and the body straightened out perfectly. Still trying to decide how to go about the wings.

@Wayne or @Jarron, either of you guys have any input on whether to leave some arc in the wings or is it best to flatten them out when putting the spars in? You can see the arc in the picture. It looks like it is intentional.

I also did some scaling and came up with some of the measurements the aloft guys used for servo and control horn locations.
The ailerons are about 150mm wide. The control horns are located between 25mm and 55mm from the inside surface of the ailerons so locate servo accordingly. The wing is about 11.5mm thick at the area where Jarron has the servo. On the website aloft recommended the emax ES 9052 MD servos. They are 8.5mm thick so they are a perfect fit.
The carbon fiber spar is located about 35mm from the LE with the servo sitting right against it.
Hope this helps anyone else who is building one of these.
Hope to bring one or 2 to Sunset.
Nope, get them flat. Your spar should help with this.
 

Wayne

Administrator
Staff member
Joined
Nov 29, 2017
Messages
7,856
Solutions
2
Reaction score
4,582
Location
Novato, CA USA
@Hawaii Sloper In this photo:
index.php

I'm gluing in the spar assembly. Notice the wood spacers under the wing, this allows the wing to be made flat. The bump out area in the middle of the wing where it keys into the fuselage and the bent up wingtips forces the use of some sort of spacer. The end result will be a nice straight wing.

But don't worry about it too much. My first build I raced through and didn't use any spacers and it ended up a little bent out of shape, but still flies great.

In other words, really doesn't matter, it is mostly cosmetic on these little guys. There seems to be enough sweep at the wing tips to impart a nice stability to the roll axis even with some anhedral.
 
Top