What's new
Aloft Forums

Welcome to Aloft Forums. Register a free account today to become a member! Once signed in, you'll be able to participate on this site by adding your own topics and posts, as well as connect with other members through your own private inbox!

Delta Project - Balsa Bullet

Simple - Ill add some quick little NACA inlets for cooling - What a pain this turned into! They are accurate backdumping NACAs though.
View attachment 25727

Rafael reports he does not like my motor mount. :cry:

Not easy to produce. o_O (I knew this as it was coming together, but he has pulled off some small miracles.)
Not that I don't like it. Haha I like its functional but its a pain to print hahaha
 
This project looks insanely fun, especially with those speeds creeping up toward 90+ mph. The 3D printer motor mount and canopy are a nice touch too. If you’re refining parts like that, having good slicer settings really makes a difference. I’ve been using Orca Slicer lately, and it’s been great for dialing in clean prints and airflow-friendly designs like your NACA inlets. Would love to see how the 6S setup performs!
 
Nearing production! We should be flying what I expect to be the production version early next week. Build manual is nearly done:

Screenshot 2026-05-08 at 9.12.24 AM.webp
 
Yeah, we can sign you up for one! We have built up one of the final versions, but have not flown it yet. We don't expect any issues. Looks like we will go for the maiden flight today.

Here is a link to the manual, still a work in progress:
 
Yeah, we can sign you up for one! We have built up one of the final versions, but have not flown it yet. We don't expect any issues. Looks like we will go for the maiden flight today.

Here is a link to the manual, still a work in progress:
Oh wow, a whole instruction manual. That seems real!

I went through it. Looks like you haven't yet put in your recommended power system. Not a big deal, if I don't have the parts on hand I'll get them from you.

I am keen on this one. I love my Ultrix 600mm (it really is a fantastic plane) and this seems like a turbo-charged variation. I like deltas, and I'm always amazing at how responsive elevon controls are.
 
bullet.webp

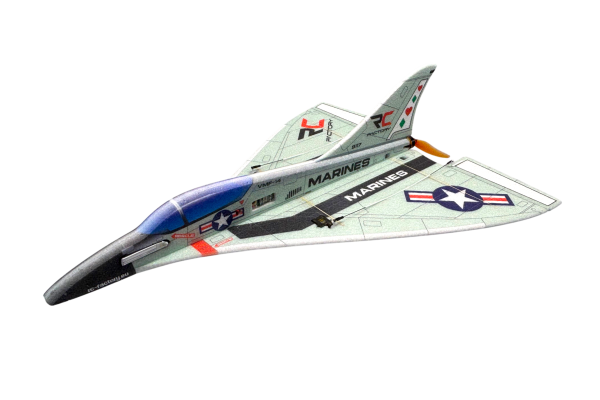
Test flight on the production model went just fine. We will be making 3 small changes, taller control horns on the elevons, cutting a hole for the battery to sit in under the canopy, and will be adding a little canopy support to keep it aligned.

The longer motor mount works great, she is very quiet (too quiet?) and the motor stays super cool. The dual fins work great.

Due the the hinging of the elevons we had a little mechanical differential. Our perfect little rolls were messy, so a little negative differential to fix this and she was making her perfect rolls again. All mass is centered on the wing now. We have a little more fuselage to hold onto on the bottom.

Performance is exactly what we were looking for.

 
View attachment 26841
Test flight on the production model went just fine. We will be making 3 small changes, taller control horns on the elevons, cutting a hole for the battery to sit in under the canopy, and will be adding a little canopy support to keep it aligned.

The longer motor mount works great, she is very quiet (too quiet?) and the motor stays super cool. The dual fins work great.

Due the the hinging of the elevons we had a little mechanical differential. Our perfect little rolls were messy, so a little negative differential to fix this and she was making her perfect rolls again. All mass is centered on the wing now. We have a little more fuselage to hold onto on the bottom.

Performance is exactly what we were looking for.

It's a beautiful plane! Kind of like a throwback to simpler times, all wood, very elegant.

Taller control horns: so it was twitchy? You're reducing throw?

I am glad to hear she's too quiet. I was at my local park this AM, wind was basically zero, and it was so pleasant to fly my usual ultra-quiet park-flyers. I didn't have to worry about bothering anyone. I love that new Twisted Hobbys Ares but there's a reason every single video has the audio track overlaid with classical music (or whatever): because that prop-in-slot is god-awful. It's like trying to enjoy your airplane while stepping on a hornet's nest. I am tempted to buy one and just cut off the nose and jam a prop up front.

Anyway, back to the Bullet - looks gorgeous. Can't wait.
 
Yep, this was Chris's build and that is what he wanted to do. He just told me it was 3 coats of Helmsman Spar Varnish, sanded between each coat. It turned out very nice, it does add some weight, but this plane is pretty darn light, so no worries. The next build out should be conventional film.

Longer control horns - Playing around some yesterday we stumbled into some different handling based on the throws at the elevons in both roll and pitch. The horns were drawn up for the original prototype where we used smaller arms on the servos, with the new layout we have to use a long servo arm, but I forget to adjust the horn lengths to match. This will allow for more of the servo resolution and also reduce potential play in the linkage. We will have a dedicated section in the manual dealing with the linkage install and correct throws, etc. Right now we are using Z-bends at both ends and I know customers are not a fan of that. LOL

Double z-bend is the ultimate for minimal slop, low weight, and reliability. However the *second* z-bend is very tricky. You need to be very precise about where you make it or you will have to use a lot of radio sub trim to adjust (which can trigger OCD for some).

However, if there is even a little play in where the servo can be glued or screwed down, double z-bend is very easy. Moving the servo a millimeter or two will take care of any lack of precision in the bend location.

My compromise is one z-bend and one L-bend. I find I am able to consistently make a good L-bend at the right spot just by lining things up and eyeballing the control rod. Then any bit of balsa, foam, or heat shrink keeps the L locked in place.

So, one possible idea is to include a simple friction-fit washer or other press-on part to lock an L-bend into the control arm (or servo arm). Anyone who can make a balsa kit can handle the first z-bend (since there is no constraint at all on location) and the second L-bend is pretty easy (if I can do it anyone can do it).
 
Yep - I think we will do in provide four small wires with a Z-bend on one end, and a two small 2x1 carbon tubes. This way they can center everything up, install the wires and slide the tube over the wires. When they are happy with position, a drop of glue at each end sectures the wires at the correct length.
 
Looks familiar!


Screenshot 2026-07-24 at 12.13.47 PM.webp
 
Back
Top