What's new
Aloft Forums

This is a sample guest message. Register a free account today to become a member! Once signed in, you'll be able to participate on this site by adding your own topics and posts, as well as connect with other members through your own private inbox!

Converting a XJT into an XHT for vintage radios

Retired

User
Joined
Aug 6, 2018
Messages
55
Reaction score
13
I asked Wayne at Aloft if Frsky made a xjt diy replacement for the dht diy module to make use of the xjt features. Including the L long range series of receivers.

He replied back no, but he’s had requests.
Thanks to Wayne supplying me with a xjt module to modify, I now have a working “XHT” diy solder in module to use for my old tx conversions.
I’m now able to use D8 or D16 mode receivers via the older tx ppm input protocol.
I also have SPort support for sensors and can use the dashboard. That test is next when I receive one.
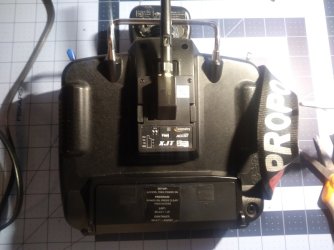
I’m posting a picture of a total reconfiguration of the XJT into a“XHT” setup to mimic the DHT configuration, including the bind- range test button /leds/mode dip switches on a dongle for remote location mounting.
Consulting with Wayne, he asked if the module could remain more Stock with only the bind/range test button on a remote 2 wire cable. The dip sw and LEDs staying where they are to make the conversion easier. The answer is YES!
If however one would want to externally change the mode from D8 to D16, that too only requires 2 wires and a on off switch, or 3 wires for both.
To remote the entire sw/led/button board requires 4 wires.
To power and input ppm, 3 wires are needed like the dht.
All easy to do.
The only difficult addition is adding a longer coax/antenna connector cable to allow more internal case location mounting in the older tx conversion.
I’ll be posting my so far hand drawings soon of the locations for adding a remote bind button and dip switch.
Or a complete removal and remoted sw/led/button board as well as the longer added antenna coax & connector cable.
Feel free to comment or add to my work. Hopes are that Frsky will make their own “XHT” and save us the trouble after seeing it’s being done.
Also, the data and Sbus pins can be left straight up or bent over.

The swr was verified before and after the antenna coax modification and was in the normal 16 to 1 range ( it does seem to wander before and after).
All bench tests compare with a unmodified xjt in a x9d+ as well as verifying the ppm only input supports D8 and D 16.
I haven’t done a old tx conversion and flight test yet but will in the coming week as time permits.
I hope this is of enough interest to have others on board with suggestions and beta testing.
Glen
C35165AA-D0E0-45C6-8E09-89028A675932.jpeg
 
Last edited:

Retired

User
Joined
Aug 6, 2018
Messages
55
Reaction score
13
Here’s a first schematic of the led/bind/dip sw daughter board.
Looking at the module board out of its case, from the back as it was in the case, I assigned my numbers to the raiser pins the daughter board sit/mounts on. Left top corner being #1 left bottom corner #4, right top corner #5 bottom right corner #8.
No connections to 2,3,6,7.
As you can see, to keep the sw board in tact but extend the bind button or the D8/D16 mode dip sw selection, it’s pretty simple.
Leaving only the antenna coax and connector extension as a more difficult mod.

73f8d81e660bd48bbfe5fa111c235333.jpg


For reference, dip sw positions for modes.


d244de50b71643276e5416aee5ef7293.png

Sent from my iPhone using Tapatalk Pro
 
Last edited:

Retired

User
Joined
Aug 6, 2018
Messages
55
Reaction score
13
Daughter board removed from the main board. I just cut the pins at the 50% point.
Not necessarily to remove the board if just the bind and or sw modes are needed. Easily extended with 2 wires or 3 if both are going to be case mounted.
S2 stays off open, and if S1 will be used externally, it’s left off open.
The external extended sw and wires connect across S1 and S1 is left in the down off position.

a937aa1ae68bca367d6ec8687272d298.jpg


c658cd59792140b62f4e5f5d0fab0065.jpg


For power and ppm in, I removed the 5 pin connector but it can stay in place and the 3 wires soldered to the shown pins on the top or bottom of the main board.
What ever works better when shrink wrapped.

863c656eb04f5a4fe3cd80ea20598ebb.jpg


Here’s a picture of the longer antenna coax I added using the same pads.

63375fd51285271b8267fce449e735b1.png

Sent from my iPhone
 
Last edited:

Wayne

Administrator
Staff member
Joined
Nov 29, 2017
Messages
7,805
Solutions
2
Reaction score
4,490
Location
Novato, CA USA
Thank you so much Glen! Very in depth.

I had not thought of it until you mentioned it in an email, but this will be a very good option for the folks in the EU that may want to convert a vintage radio, but want to use the new LBT mode required there.

For those that may be wondering why Glen went to all of this trouble? Well, a lot of folks enjoy converting and flying with vintage radios. A very common and method is to use the FrSky DHT module, this is a module that is specially designed to solder into older radios and update them to a modern RF system. We have some customers that have bought over 20 of these modules and installed them into their fleet of vintage radios. Another option is to convert there favorite radio to a more affordable RF system, we see a lot of folks converting radios like the Airtronics over.

Here is the issue, the DHT only works with D series receivers, not the newer and far more advanced X series. But frSky does make the XJT module for use with JR module bays, but I have never been able to talk them into adapting the XJT into an XHT (solder in) version. Why do we care about the X series receivers? Like the D series, they are a full telemetry receiver, they report back the voltage and the signal strength to the XJT. They also support a ton of sensors, the D series are pretty much limited to voltage these days. Also, there are only two D series receivers left in the line up, the X have MANY receivers to fit pretty much any needs you may have! Then there is the Dashboard that can plug into the XJT. The Dashboard is an OLED display and programmer for the XJT, and it can also display all the telemetry from the sensors, flash firmwares, and even has speech to read your telemetry data (I think it can do vario tones also)! Now the Dashboard has some firmware issues, but we are going to work on FrSky to fix these issues.

The end result is that the XJT can REALLY pack a lot of power into a very affordable package. It will give older radios a brand new lease on life and offer them the best range on the market for 2.4 systems.

I have been telling people for years that the XJT would be a great choice, but I'm not sure anyone documented the steps. When Glen was asking some questions I thought he was the perfect guy to document this and share his work for everyones benefit. He has done a GREAT job, going into much more detail than I expected.

The simple way to use this module, is to connect just 5 wires and a switch, 2 for power, 1 for the PPM signal, and the last 2 wires go to a button for binding. I see no reason anyone would need access to the dip switches to change modes, there is no reason you would want to use D8 (D series receivers) with this module.

Any questions, please feel free to ask away!
 

Retired

User
Joined
Aug 6, 2018
Messages
55
Reaction score
13
Thanks for the support to make it happen Wayne.
As time permits I’ll do a mechanical component drawing of the daughter board and main boards power and ppm input.
I have a hand drawn ones that match the posted schematic and discussion, but the part#’s can be seen on the daughter board closeup picture or the module if you have one.
The important connections are already discussed as well as the 3 wires needed on the main board.
If my hand drawn diagrams are needed right away, I can temporarily post them until replaced with better ones.
About the 3 wires, +,-, and ppm in.
With the 5 pin connector left in tact, a male 5 pin header could be used with the 3 wires soldered on.

Then this could plugged into the main board 5 pin connector before shrink wrapping it.
The wrap would hold the header in place.
Less on board soldering to do, less chance of damage.

Yes to realizing the added advantages to a XHT module over a DHT. The more I thought about it the better it got!
Fw options, D8 or D16 receiver comparability, lbt fw capable, oled Dashboard, swr monitoring and L9 and L12 long range receiver capable.

Believing in full testing and disclosure, I’ll be removing a dht from a recently successful converted and flown proline 1970’s 3 ch conversion (with new batteries explained why later) I know works great and installing this XHT conversion instead.
Transmits 4 ch but only 3 are variable.
I believe 6 ch may be the upper limit ppm wise with a 18ms fw receiver in the D8 mode, not sure about the D16 mode firmware, but I’ll have to check that out. Flashing 22ms fw would give headroom and if used in these older transmitters, 22ms is still fast.

Actually writing this I realized I can use any of my Taranis or Qx7’s in ppm mode and load up the channels at least to 6 and then 8, and see how they decode in the D8 vs D16 receivers?
This all may have been discussed so I’m open to opinions or links to it so I can skip these steps.

For now it’s important to verify the antenna coax extension and board extension wires haven’t caused any unforeseen issues. Certainly shouldn’t as proven in the dht!
Then a must is doing a line of sight flying range test with D8 and D16 receivers.
When I receive a dashboard I’ll check it out for full compatibility. Nothing should be different due to the simple modifications to make a solder in module.

All this will be done within the week as hobby time permits.
For those wanting to make a XHT diy, wait a few more days/a week for my full test report.

Why you must not take shortcuts!
Flight test story of of a newly converted tx.
Doing a simple flight test with a newly converted single stick to 2.4g, I set the failsafe for motor off and a slight up circling left.
The conversion went great but I made the mistake of cycling and accepting the 1970 Nicad tx pack.
All went well until 2 min into the test flight the battery pack voltage fell off it almost dead!
The dht did sound the low receiver battery and critical rssi beeps, so many beeps, but no way to recover.
The failsafe kicked in and the powered test glider just floated in a perfect wide circle traveling down wind.
Finally combing to a perfect rest atop a large tall pine tree.
Keen eyes not mine, saw it hit the treetops a block distance away!
Got it back several days later by paying a younger person to climb to the tree top and retrieve it.
The moral here is #1, use new batteries in conversions! # 2, set failsafe for a left or right tight turn with some down in it. Better to keep it close and damaged, then to watch it fly away in a perfect glide!

It’ll now be used for testing this XHT conversion with a failsafe set to not fly away if anything goes wrong this time. It shouldn’t!


Sent from my iPhone using Tapatalk Pro
 
Last edited:

Retired

User
Joined
Aug 6, 2018
Messages
55
Reaction score
13
Got a donation for the install test.
Series 80 kraft 5 ch AM tx.
It uses 8 sub c’s ( or maybe 4/5 sub c’s) in the battery case that also holds the encoder board.
A bit of a challenge because I’ll probable use a inexpensive Life 1500ma 9.6v battery and will have to use another mounting arrangement for the encoder board.
Using Wayne idea of only extending the bind button, I’ll use the unused but plugged hole in the case top for the bind button.
Since I don’t want to mount the xjt daughter board back in the main board for now, I’ll find a place in the case for it and put some clear shrink over it exposing only the S1 dip sw access for D8 or D16 receivers.

I like the option for demos.
May be a slight delay in any flight tests while I get this all together.

I’d rather do a fresh install so it can remain that way.

48cd005ff9146014e3569f27cd8c3c24.jpg


d93f26df0cbc24643161b2853e56758a.jpg


You can see where it was serviced last. ARCS. I don’t think it’s in business still?


Sent from my iPhone using Tapatalk Pro
 
Last edited:

Retired

User
Joined
Aug 6, 2018
Messages
55
Reaction score
13
Did the kraft conversion today. Went well. A few mounting challenges and wire sorting out, but in the end it’s working.
I’m not going to go into too many details on the kraft series 80 conversion. I can but there’s a rcg thread on old tx conversions.
I will however if we want to start a old time tx to Frsky 2.4g conversion, my focus.
And of course, anything that’s ok with Wayne.
I’ll just hit on the highlights for now as actual flight testing is next.
First off this tx used 8 3/4 size C nicsde in a molded battery case. The encoder was also mounted to this case top.
See picture!
To speed up this install I took the battery box out and used 2 sided foam tape to mount a new 1500ms 9.9v life battery. Then I used the same tape to mount the kraft encoder to the life battery.
I did the same to mount the new XHT converted module to a bracket already in the tx case.
I also mounted in my case because I separated the board , the daughter led/bind/range test button/ board to the life battery.
From the prior posted board schematic, I just added 1 wire to pin (5) and added a bind button in a hole already there and ground.
The one button was Wayne’s idea to make it easier.
Since I had already separated and extended on wires the daughter board , I mounted it as explained.
I think with the data pins bent over as I have, a xjt with the daughter board stock, would still have cleared the case back in this installation.
The antenna mounting was a challenge. Even thou the threaded antenna gold connector is long, you must leave enough exposed ( above the gold nut) for the screw on antenna to fully seat!
To use the old antenna hole, I used a piece of thin plastic and again 2 sides tape to mounted to the inside case top. I made a home for the connector in the plastic and was able to tighten the but using needle nose pliers in the hole.
Connected wires switched voltage and ppm in.

Ok, the outcome.
Bind button works and also does range test.
I bound to a D8 receiver and tall 5 channels of the Kraft were there and working!
I bound to a D16(X) receiver and it was the same.

Note, I powered off the tx and set dip 1 up for D8, down for D16 modes and then powered on again each time.
There’s no pxx- model match when using the ppm mode and x receivers.

All servos work. Tx pots were dirty but a cleaning fixed any skipping. Who knows how long this tx has been out of service?
So asap I’ll do a range check and flight in each receiver protocol.
Then I can call this a success.

6529ca2432cfa184d8c186c9b216e4c1.jpg


3614a437761a9a7445c74cae0ad3e140.jpg


Sent from my iPhone using Tapatalk Pro
 
Last edited:

Wayne

Administrator
Staff member
Joined
Nov 29, 2017
Messages
7,805
Solutions
2
Reaction score
4,490
Location
Novato, CA USA
Very nice.

The PPM should be able to feed 8 channels if the radio has them. D8 or D16, no problems with 8 channels. D16 mode can bind up to 16 channels, but you will not get a PPM feed to support that many.

-Wayne
 

Retired

User
Joined
Aug 6, 2018
Messages
55
Reaction score
13
I threw together a expanded scale voltmeter circuit that uses the kraft meter and follows the 1500ma 9.9v life battery from 10v full scale to 6.6-6.8 low scale. Enough range to know at 1/2 scale I’m in the 7-8v range and should recharge soon.
Good enough for this quick beta install and conversion.
In testing on a variable supply I verified that the module and kraft encoder are solid at 6v, way lower than the 6.8-7v the life should be discharged to for safety.

I also did a range test at my home street. Either D8 or D16 mode in the range test mode went my block with some rssi beeps as long as the antenna was not blocked by my body.
I did cup my hand over the antenna at that distance and I did lose link with a lot of beeping ( love that feature!). While still cupping the antenna I hit the range test button and took it out of the test mode. I instantly regained link and servo control again, antenna still blocked. I then continued to walk with a solid link to where I couldn’t see my test flag waving any longer. Again same for both receivers.
I didn’t expect any range issues since the xjt module has great specifications and reputation, but I did add a new longer coax cable and modified it so anything could go wrong.
So tomorrow I’ll be doing the same tests at the local club field and and many flight tests with both type receivers.
I’m confident that unless this 30+ year old Kraft suffers a part failure, it’ll be a success and recommended as a option that allows use of the newer Frsky receivers in a favorite older type tx you hate to retire!
I think we all may have our first one on the shelf we hate to trash.


Sent from my iPhone using Tapatalk Pro
 
Last edited:

Retired

User
Joined
Aug 6, 2018
Messages
55
Reaction score
13
Wrapping it up!
Great test flights today with no issues with a D8 or X receiver. Flew to practical line of sight with no control issues or RSSI earnings. As expected!
The xjt to a XHT conversion is a practical option for those wanting the receiver flexibility.
Also I’m thinking that if a small pc board was made with 5 long male pins and pads for soldering the the + -, and ppm keeping a thin profile, it could eliminate soldering to the module.
This further simplifies a diy conversion.
Thank you Wayne for supporting this project and peaking my interest in doing it.
Any questions can be posted here or in a PM if I’ve missed something.
Glen

Hopefully Frsky will agree a XHT maybe replacing the DHT is a cost effective more modern and versatile product !


Sent from my iPhone using Tapatalk Pro
 

Wayne

Administrator
Staff member
Joined
Nov 29, 2017
Messages
7,805
Solutions
2
Reaction score
4,490
Location
Novato, CA USA
Yeah, I may have to special order them with some of our own specs.. See if they will do up a batch of them for us.
 

Retired

User
Joined
Aug 6, 2018
Messages
55
Reaction score
13
Final thoughts of what was previously posted.
If they add a coax antenna connector it wouldn’t be too much to ask but it would make the conversion very diy friendly.
That’s the only critical soldering required now, adding a longer antenna coax.
If the pc board height doesn’t interfere with any internal case mounting, it would only require 1 wire besides common ground, soldered to the dip sw board ( bind/range test) to a push button.
A daughter pc 5 make pin thin pc board with 3 wires (+’-, ppm in) pre soldered and made available, would eliminate all soldering to the xjt board except the one wire. That wire is tack soldered to a easy accessible point.

Aloft could offer a diy kit that includes a push button with wires, a longer coax antenna cable with matching board connector, and a 5 make pin with the 3 wires attached, and a length of shrink wrap ( thinking clear).
If the board is certified FCC, CE with the installed coax connector, this should still be certified as long as the origins 2db antenna is used, the way it was passed originally.

The only issue I see is price. Purchasing it without the case and under $30 would make it a better choice than the current dht.
If Frsky was to make it an actual XHT product, why keep the dht in the future? One product does it all and is moving forward to take advantage of the improvements and options not available with the dht.
For now Wayne, especially with the coax connector added, you wouldn’t be stuck with new stock. If a request is made for a XHT, it’s easy to convert a xjt in stock.
Glen


Sent from my iPhone using Tapatalk Pro
 

georgewaldrop

New User
Joined
Mar 29, 2018
Messages
2
Reaction score
0
Location
Mustang, OK
Glen, Wayne,

I know this is a bit of a old thread, but I would like more info on this mod...did the XHT module request go anywhere? I am not a technician by any stretch, but have several old radios I'd like to accomplish this mod on. I have an old Sport Series Kraft, two old FGK series Futaba, an Ace Oly and a couple old Airtronics radios...this would be the perfect conversion for all of them IMO, so that they could still be used. Hope to hear that the module has been made available as a DIY platform. TIA
Have a Blessed Day
George Waldrop
 

Wayne

Administrator
Staff member
Joined
Nov 29, 2017
Messages
7,805
Solutions
2
Reaction score
4,490
Location
Novato, CA USA
Sorry, frSky has been working on some other projects. I don't think they are going to listen to this request, I have been bugging them for a couple of years now. :(
 

georgewaldrop

New User
Joined
Mar 29, 2018
Messages
2
Reaction score
0
Location
Mustang, OK
Thanks Wayne. I would, for one, be interested if it ever came about. I guess I may have to try to follow Glen's directions and do a few myself. Thanks again.
 

Retired

User
Joined
Aug 6, 2018
Messages
55
Reaction score
13
Thanks Wayne. I would, for one, be interested if it ever came about. I guess I may have to try to follow Glen's directions and do a few myself. Thanks again.

Funny that I felt a need to check into Wayne’s forum today. I bought a 3D printer earlier this year and been busy with it and haven’t kept up. The “XHT” diy is still working. It’s been awhile since I did the mod and writeup so I should review my work to be current.
I had hopped frsky would have acted on what Wayne and I presented as a 2019 more versatile DIY 2.4g conversion to replace the DHT that’s not usable in all countries now.
I only have the one converted tx with the XHT conversion I’m holding on to.
I do have various Kraft’s and Proline tx’s converted to dht’s however.
As a side note George, as much as I like the older tx’s, I’m thinking of liquidating them to a good home.
They’ll all need a D receiver.
If there’s a private message option for this forum, send me a email address with any questions on the conversion.
Glen
Wayne, I’ll be at the hobby show in November and I’ll stop by to look at the new RC systems.


Sent from my iPhone using Tapatalk Pro
 

Jay1977

New User
Joined
Dec 6, 2019
Messages
28
Reaction score
6
Im doing this Monday. I ordered the XJT module and V8 rx from Aloft on the 5th & my donor transmitter is a JR XP7202. Im going to direct solder the 3 PPM wires to the board but leave the rest as is and mount the modue externaly and use the 72m antenna base as a support for the dashboard when Aloft gets them back in stock. After I am done with the 2.4 conversion, what is left for the module to talk telemetry between the dashboard, onboard sensors & the recivier. Thanks for your emails Wayne. Jay
 

Retired

User
Joined
Aug 6, 2018
Messages
55
Reaction score
13
Hi everyone, wow I see interest in the xjt conversion is happening.
The module data pins still work so I’m thinking just use them as intended.


Sent from my iPhone using Tapatalk Pro
 

Jay1977

New User
Joined
Dec 6, 2019
Messages
28
Reaction score
6
I just finished mine. Works perfectly. I only soldered the 3 PPM connections and cut the back of the transmitter case so the XJT module will snap in just like a radio with an external module bay. I stuck a cheap timer on top thats just a place holder until Aloft gets the smart port dashboard back in stock and thats where itll go. Thanks guys for the support. Jay
 

Attachments

  • 20200211_091734.jpg
    20200211_091734.jpg
    199.7 KB · Views: 461
  • 20200211_091821.jpg
    20200211_091821.jpg
    247 KB · Views: 417
Top